Report Memphis.dev Cloud Performance And Load Report
Tutorials
Stateful stream processing with Memphis and Apache Spark

 Contents
Amazon Simple Storage Service (S3) is a highly scalable, durable, and secure object storage service offered by Amazon Web Services (AWS). S3 allows businesses to store and retrieve any amount of data from anywhere on the web by making use of its enterprise-level services. S3 is designed to be highly interoperable and integrates seamlessly with other Amazon Web Services (AWS) and third-party tools and technologies to process data stored in Amazon S3. One of which is Amazon EMR (Elastic MapReduce) which allows you to process large amounts of data using open-source tools such as Spark.
Apache Spark is an open-source distributed computing system used for large-scale data processing. Spark is built to enable speed and supports various data sources, including the Amazon S3. Spark provides an efficient way to process large amounts of data and perform complex computations in minimal time.
Memphis.dev is a next-generation alternative to traditional message brokers.
A simple, robust, and durable cloud-native message broker wrapped with an entire ecosystem that enables cost-effective, fast, and reliable development of modern queue-based use cases.
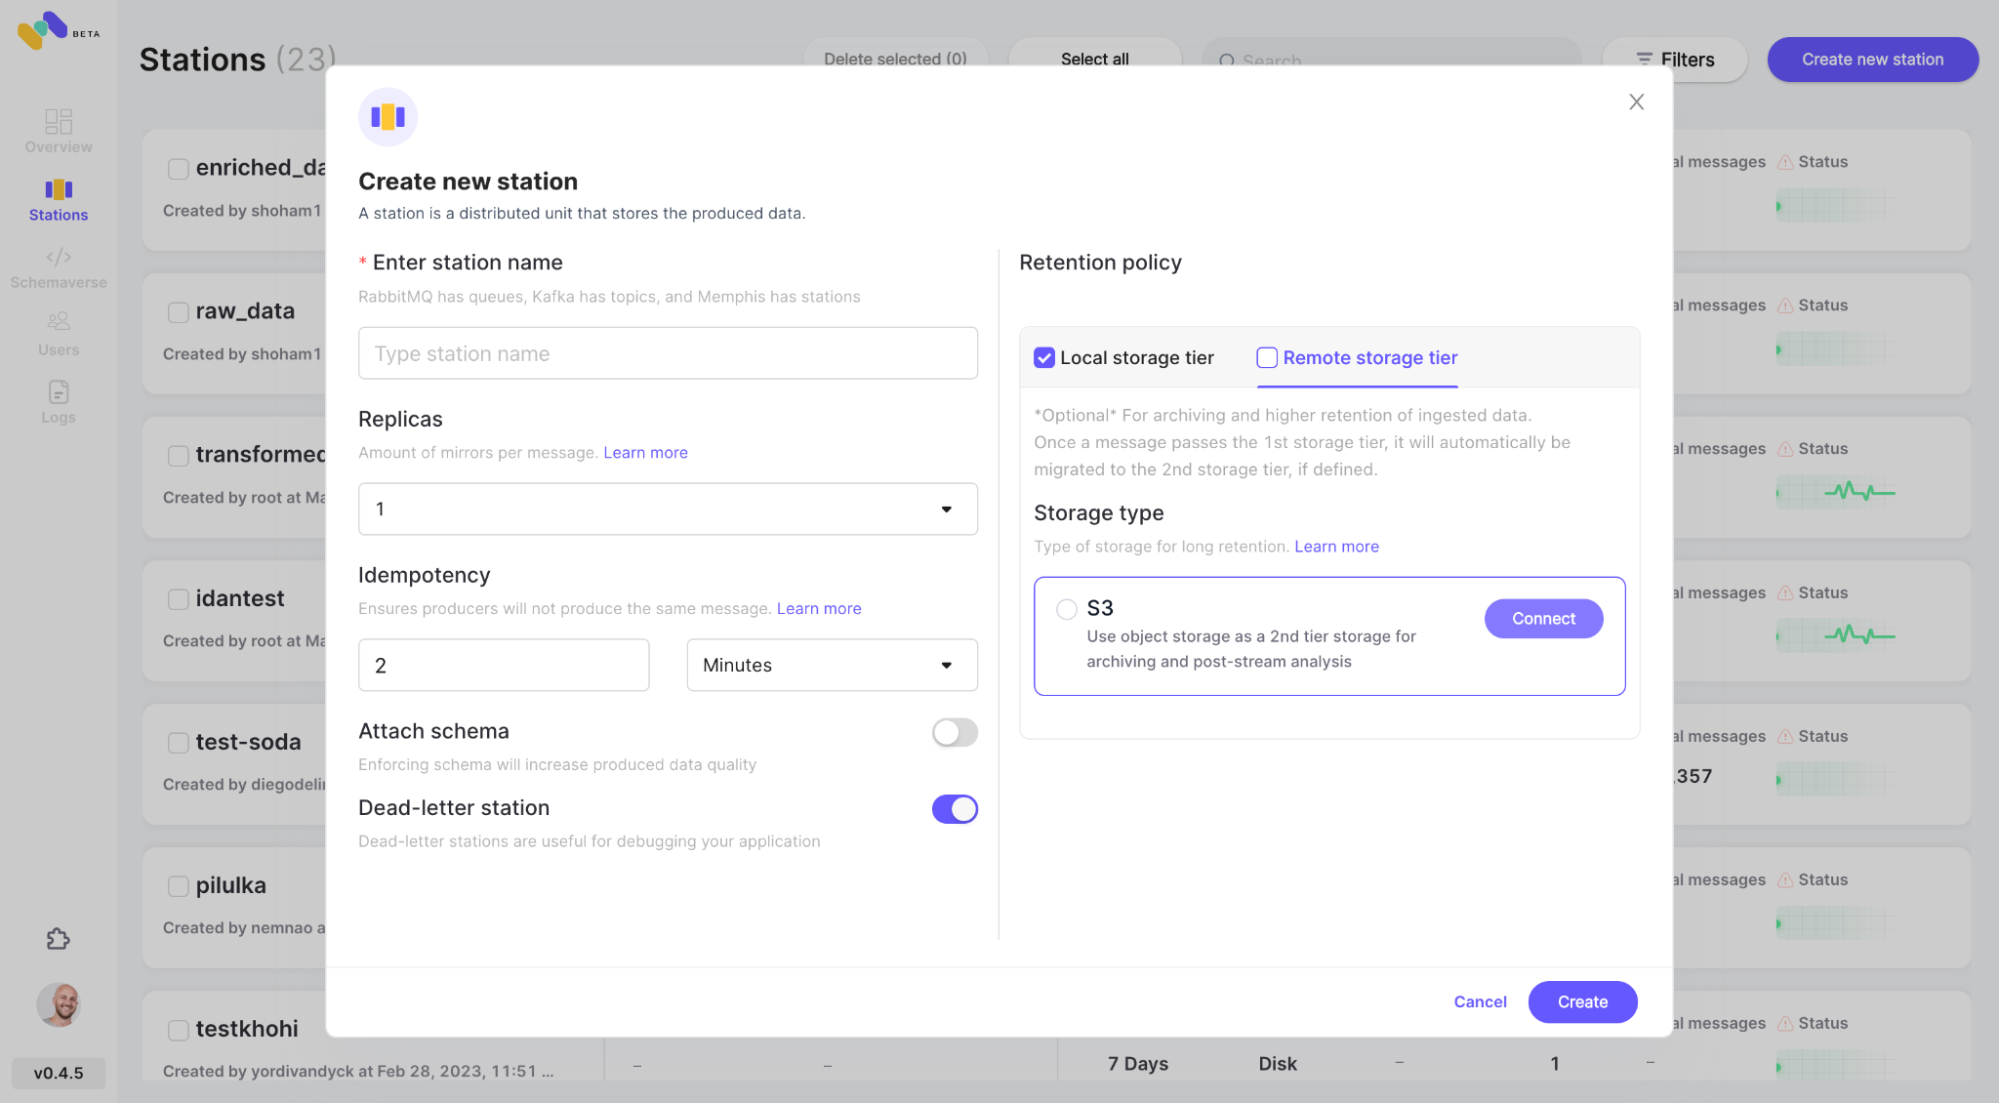
The common pattern of message brokers is to delete messages after passing the defined retention policy, like time/size/number of messages. Memphis offers a 2nd storage tier for longer, possibly infinite retention for stored messages. Each message that expels from the station will automatically migrate to the 2nd storage tier, which in that case is AWS S3.
In this tutorial, you will be guided through the process of setting up a Memphis station with a 2nd storage class connected to AWS S3. An environment on AWS. Followed by creating an S3 bucket, setting up an EMR cluster, installing and configuring Apache Spark on the cluster, preparing data in S3 for processing, processing data with Apache Spark, best practices, and performance tuning.
Setting up the Environment
Memphis
- To get started, first install Memphis.
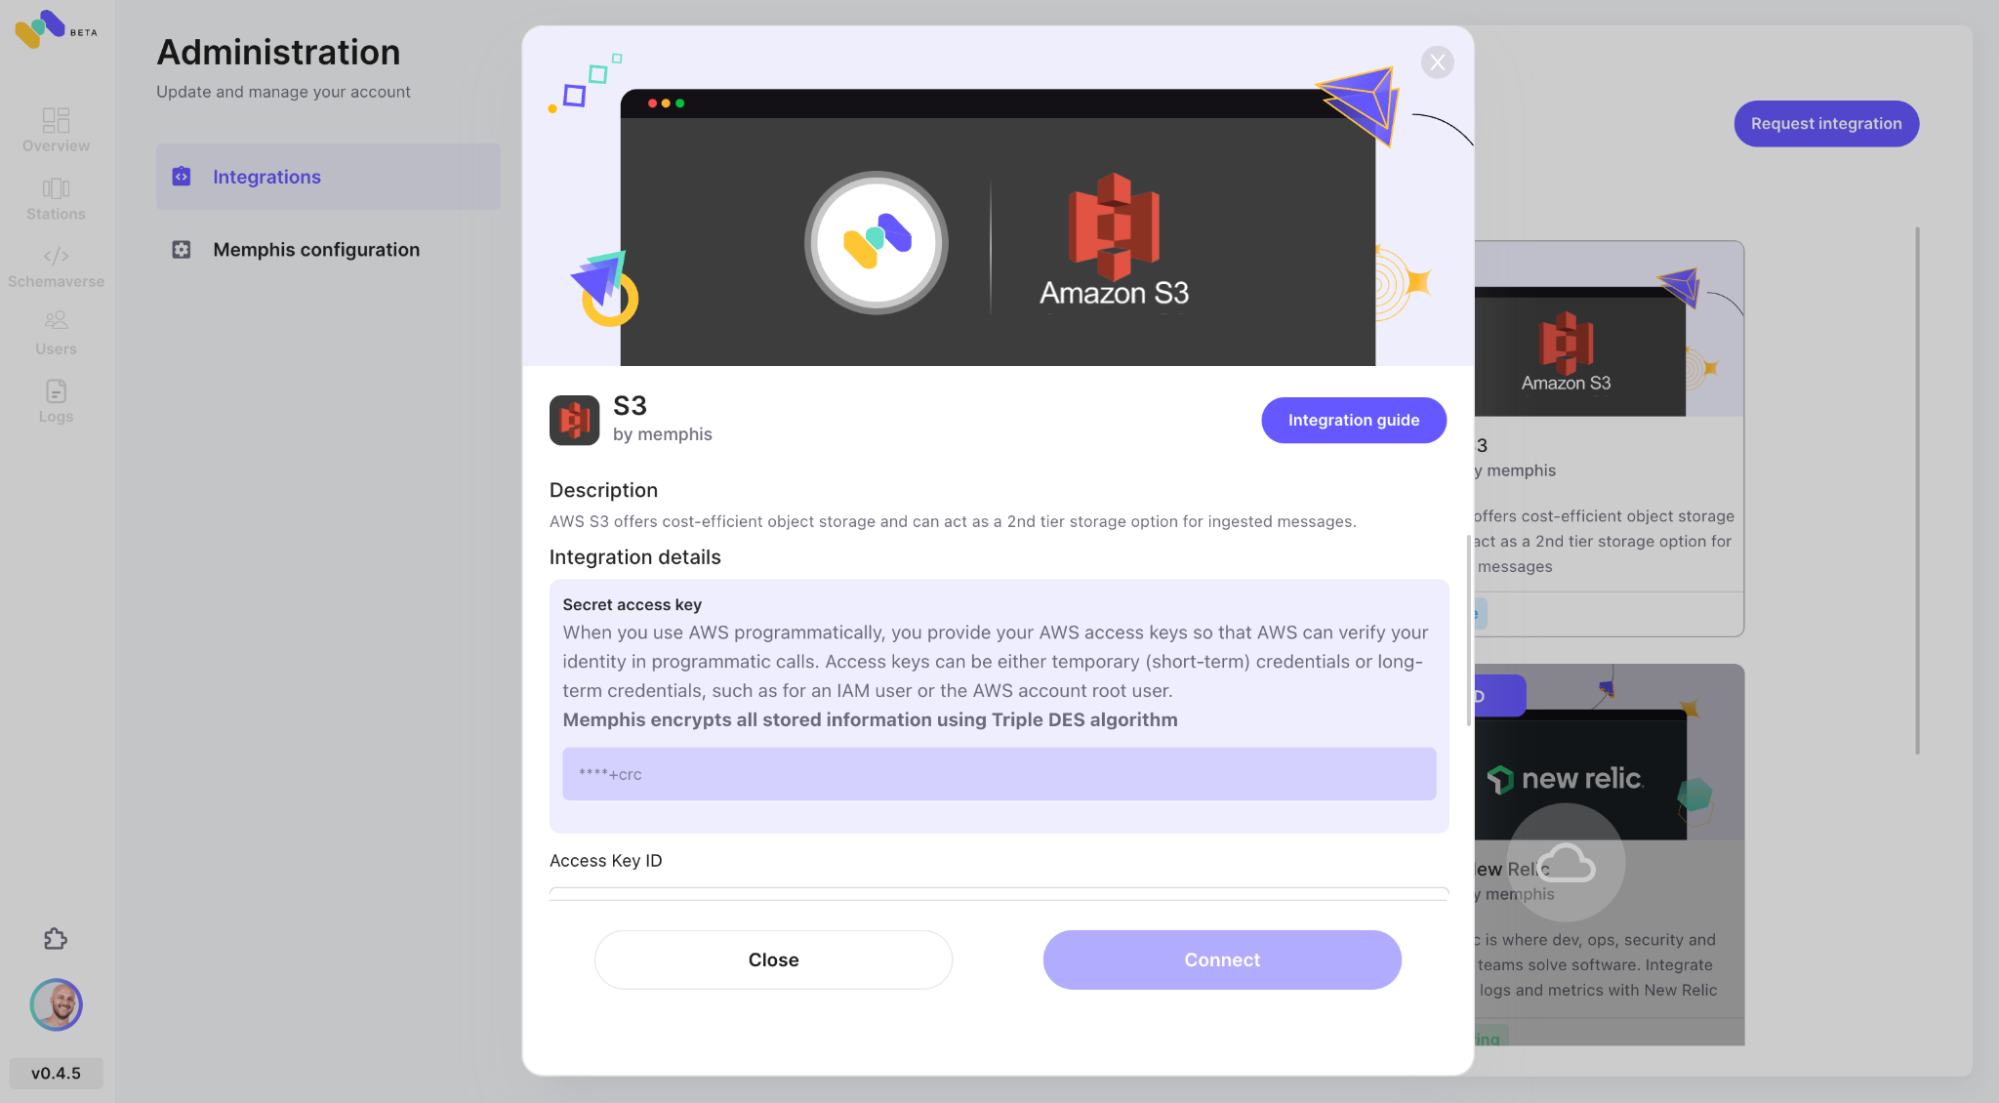
- Enable AWS S3 integration via the Memphis integration center.

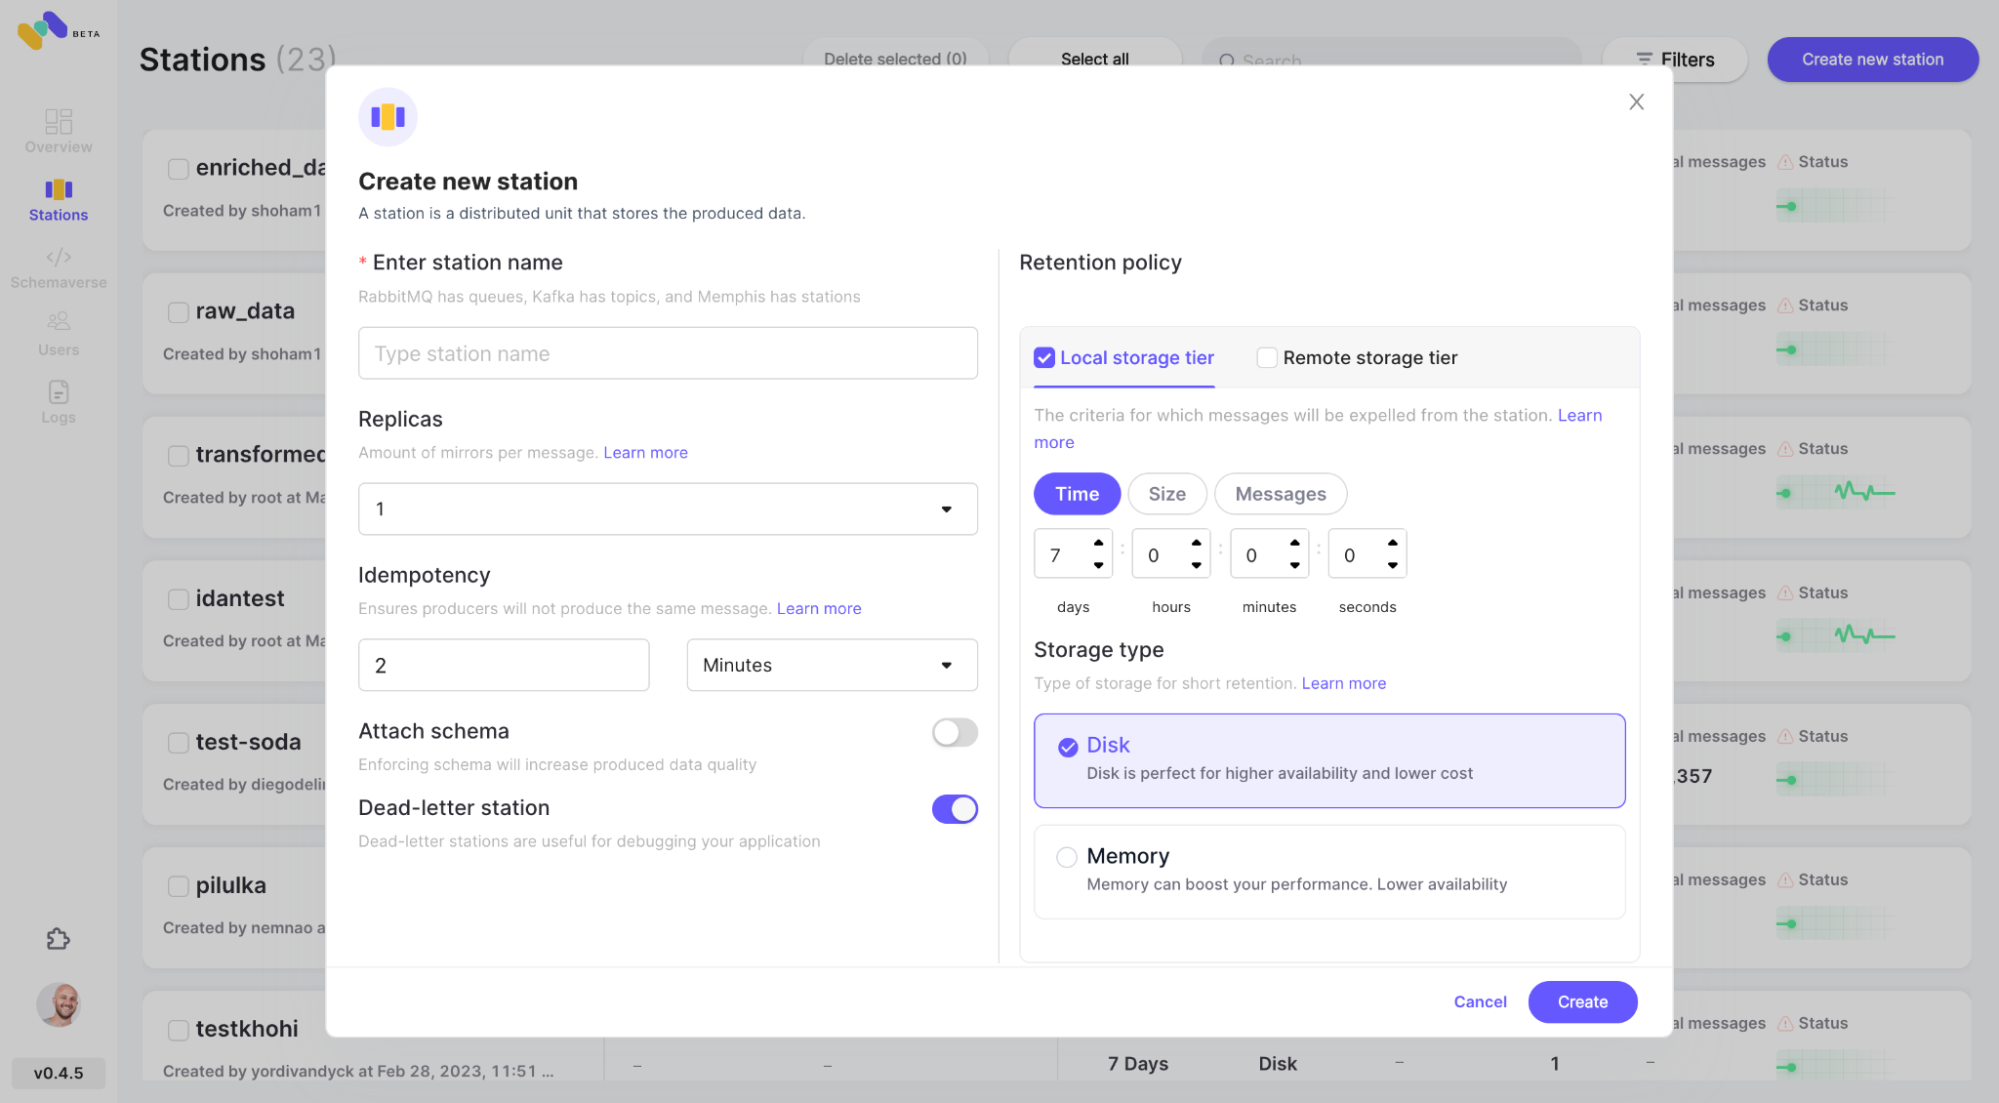
- Create a station (topic), and choose a retention policy.
- Each message passing the configured retention policy will be offloaded to an S3 bucket.
- Check the newly configured AWS S3 integration as 2nd storage class by clicking “Connect”.
- Start producing events into your newly created Memphis station.
Create an AWS S3 Bucket
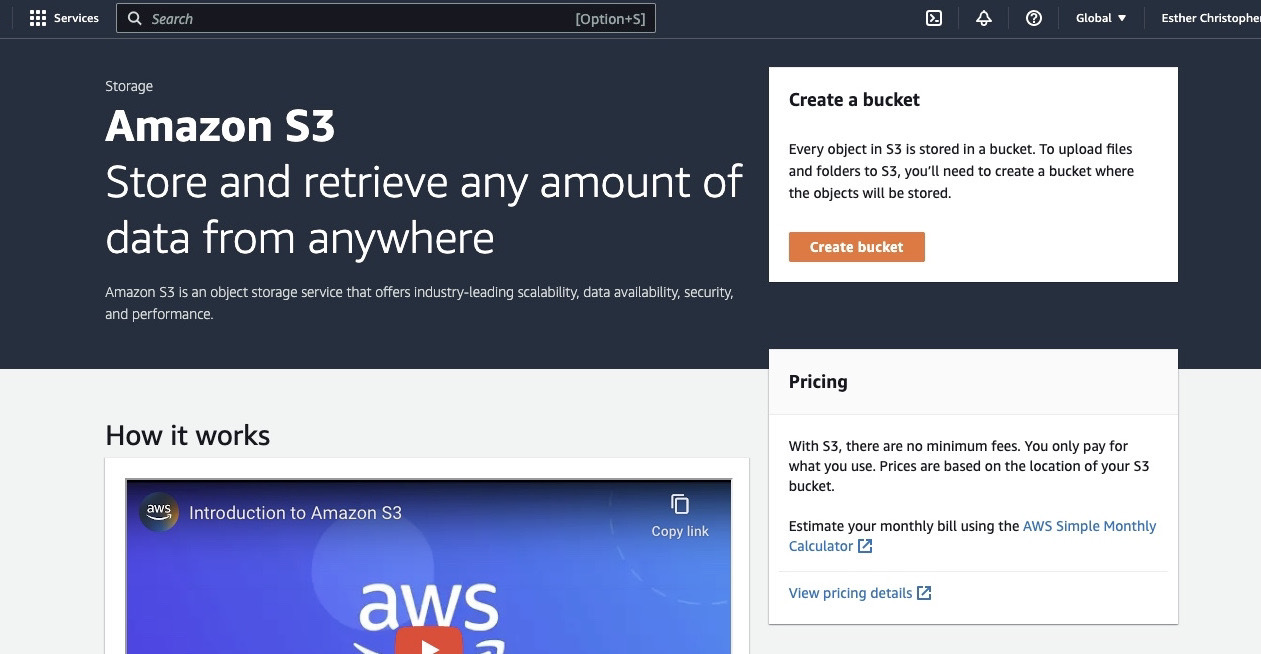
If you haven’t done so already, first you need to create an AWS account at https://aws.amazon.com/. Next, create an S3 bucket where you can store your data. You can use the AWS Management Console, the AWS CLI, or an SDK to create a bucket. For this tutorial, you will use the AWS management console at https://console.aws.amazon.com/s3/.
Click on “Create bucket”.
Then proceed to create a bucket name complying with the naming convention and choose the region where you want the bucket to be located. Configure the “Object ownership” and “Block all public access” to your use case.
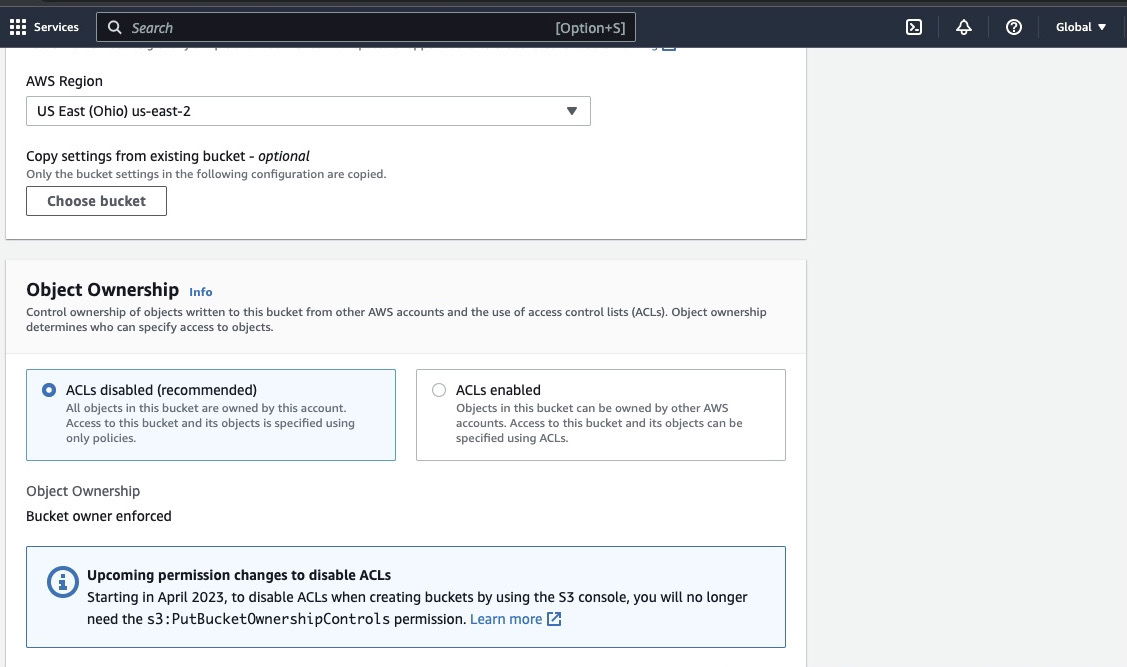
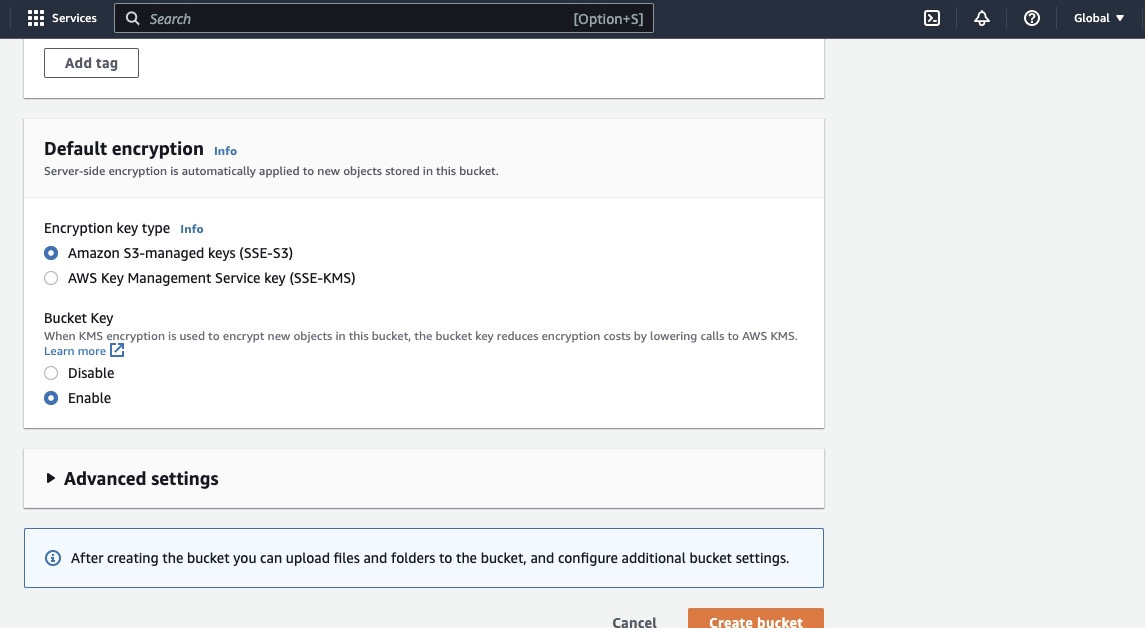
Make sure to configure other bucket permissions to allow your Spark application to access the data. Finally, click on the “Create bucket” button to create the bucket.
Setting up an EMR Cluster with Spark installed
The Amazon Elastic MapReduce (EMR) is a web service based on Apache Hadoop that allows users to cost-effectively process vast amounts of data using big data technologies including Apache Spark. To create an EMR cluster with Spark installed, open the EMR console at https://console.aws.amazon.com/emr/ and select “Clusters” under “EMR on EC2” on the left side of the page.
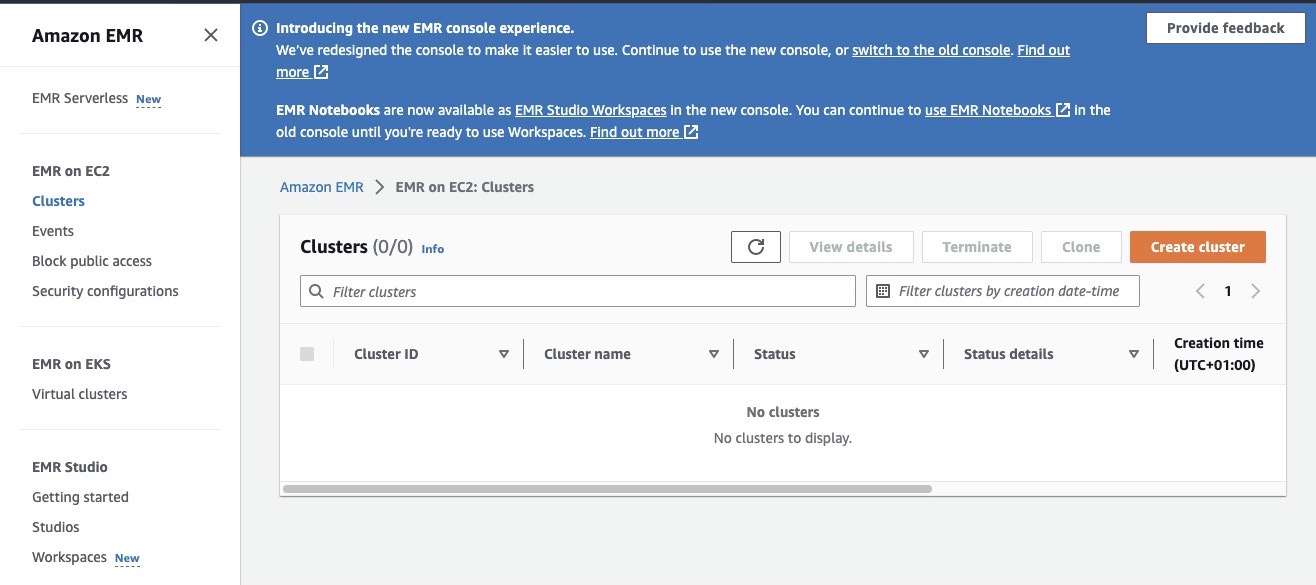
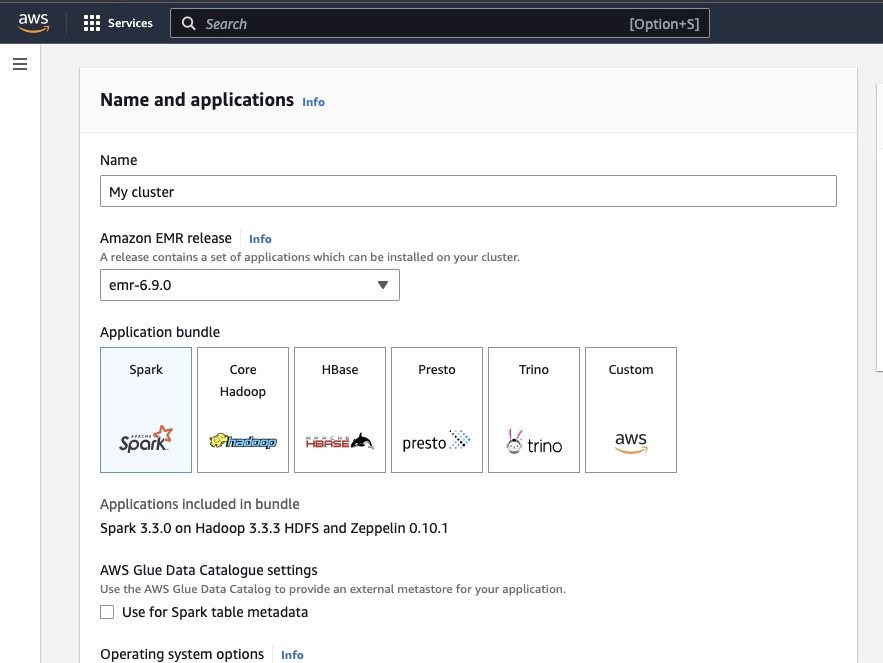
Click on “Create cluster” and give the cluster a descriptive name.
Under “Application bundle”, select Spark to install it on your cluster.
Scroll down to the “Cluster logs” section and select the checkbox of Publish cluster-specific logs to Amazon S3.
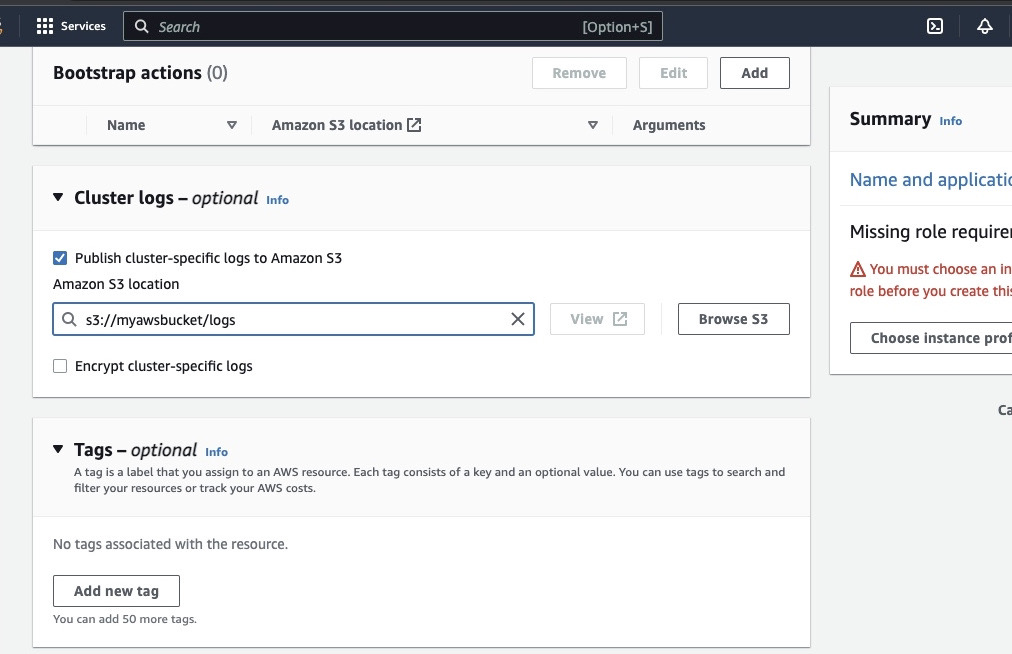
This will create a prompt to enter the Amazon S3 location using the S3 bucket name you created in the previous step followed by /logs, ie., s3://myawsbucket/logs. /logs are required by Amazon to create a new folder in your bucket where Amazon EMR can copy the log files of your cluster.
Go to the “Security configuration and permissions section” and input your EC2 key pair or go with the option to create one.
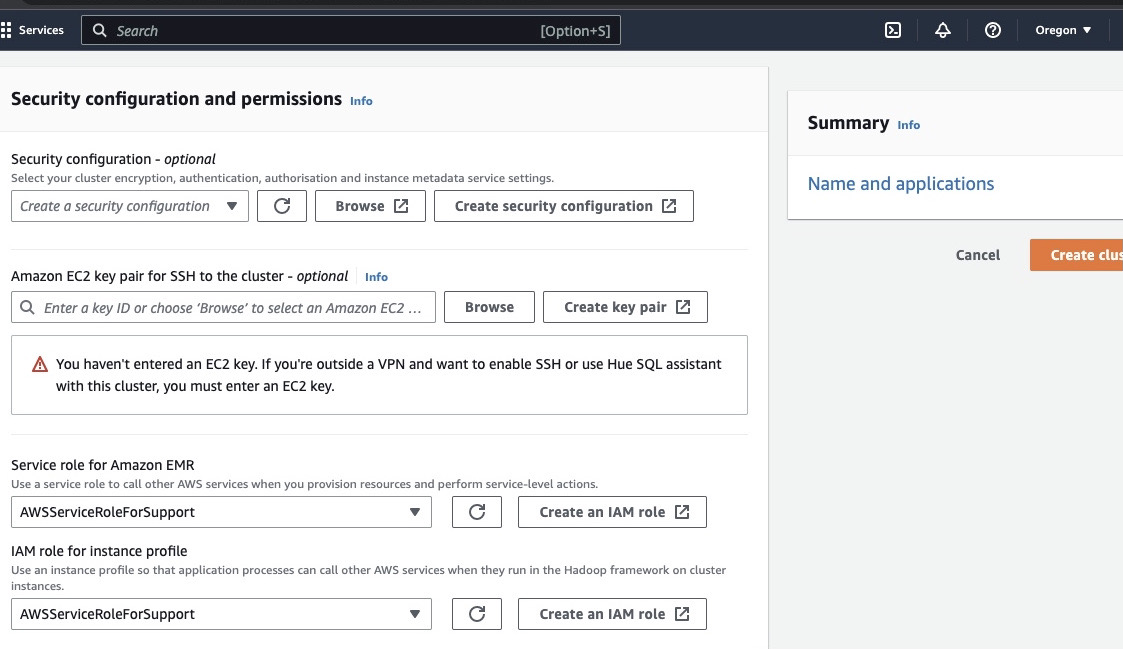
Then click on the dropdown options for “Service role for Amazon EMR” and choose AWSServiceRoleForSupport. Choose the same dropdown option for “IAM role for instance profile”. Refresh the icon if need be to get these dropdown options
Finally, click the “Create cluster” button to launch the cluster and monitor the cluster status to validate that it’s been created.
Installing and configuring Apache Spark on EMR Cluster
After successfully creating an EMR cluster the next step will be to configure Apache Spark on the EMR Cluster. The EMR clusters provide a managed environment for running Spark applications on AWS infrastructure, making it easy to launch and manage Spark clusters in the cloud. It configures Spark to work with your data and processing needs and then submits Spark jobs to the cluster to process your data.
You can configure Apache Spark to the cluster with the Secure Shell (SSH) protocol. But first, you need to authorize the SSH security connections to your cluster which was set by default when you created the EMR cluster. A guide on how to authorize SSH connections can be found here.
To create an SSH connection, you need to specify the EC2 key pair that you selected when creating the cluster. Then connect to the EMR cluster using the Spark shell by first connecting the primary node. You first need to fetch the master public DNS of the primary node by navigating to the left of the AWS console, under EMR on EC2, choose Clusters, and then select the cluster of the public DNS name you want to get.
On your OS terminal, input the following command.
ssh hadoop@ec2-###-##-##-###.compute-1.amazonaws.com -i ~/mykeypair.pem
Replace the ec2-###-##-##-###.compute-1.amazonaws.com with the name of your master public DNS and the ~/mykeypair.pem with the file and path name of your .pem file (Follow this guide to get the .pem file). A prompt message will pop up to which your response should be yes. Type in exit to close the SSH command.
Preparing Data for Processing with Spark and uploading to S3 Bucket
Data processing requires preparation before uploading to present the data in a format that Spark can easily process. The format used is influenced by the type of data you have and the analysis you plan to perform. Some formats used include CSV, JSON, and Parquet.
Create a new Spark session and load your data into Spark using the relevant API. For instance, use the spark.read.csv() method to read CSV files into a Spark DataFrame.
Amazon EMR, a managed service for Hadoop ecosystem clusters, can be used to process data. It reduces the need to set up, tune, and maintain clusters. It also features other integrations with Amazon SageMaker, for example, to start a SageMaker model training job from a Spark pipeline in Amazon EMR.
Once your data is ready, using the DataFrame.write.format(“s3”) method, you can read a CSV file from the Amazon S3 bucket into a Spark DataFrame. You should have configured your AWS credentials and have written permissions to access the S3 bucket.
Indicate the S3 bucket and path where you want to save the data. For example, you can use the df.write.format(“s3”).save(“s3://my-bucket/path/to/data”) method to save the data to the specified S3 bucket.
Once the data is saved to the S3 bucket, you can access it from other Spark applications or tools, or you can download it for further analysis or processing. To upload the bucket, create a folder and choose the bucket you initially created. Choose the Actions button, and click on “Create Folder” in the drop-down items. You can now name the new folder.
To upload the data files to the bucket, select the name of the data folder.
In the Upload – Select “Files wizard” and choose Add Files.
Proceed with the Amazon S3 console direction to upload the files and select “Start Upload”.
It’s important to consider and ensure best practices for securing your data before uploading your data to the S3 bucket.
Understanding Data Formats and Schemas
Data formats and schemas are two related but completely different and important concepts in data management. Data format refers to the organization and structure of data within the database. There are various formats to store data, ie., CSV, JSON, XML, YAML, etc. These formats define how data should be structured alongside the different types of data and applications applicable to it. While data schemas are the structure of the database itself. It defines the layout of the database and ensures that data is stored appropriately. A database schema specifies the views, tables, indexes, types, and other elements. These concepts are important in analytics and the visualization of the database.
Cleaning and Preprocessing Data in S3
It is essential to double-check for errors in your data before processing it. To get started, access the data folder you saved the data file in your S3 bucket, and download it to your local machine. Next, you will load the data into the data processing tool which would be used to clean and preprocess the data. For this tutorial, the preprocessing tool used is Amazon Athena which helps to analyze unstructured and structured data stored in Amazon S3
Go to the Amazon Athena in AWS Console.
Click on “Create” to create a new table and then “CREATE TABLE”.
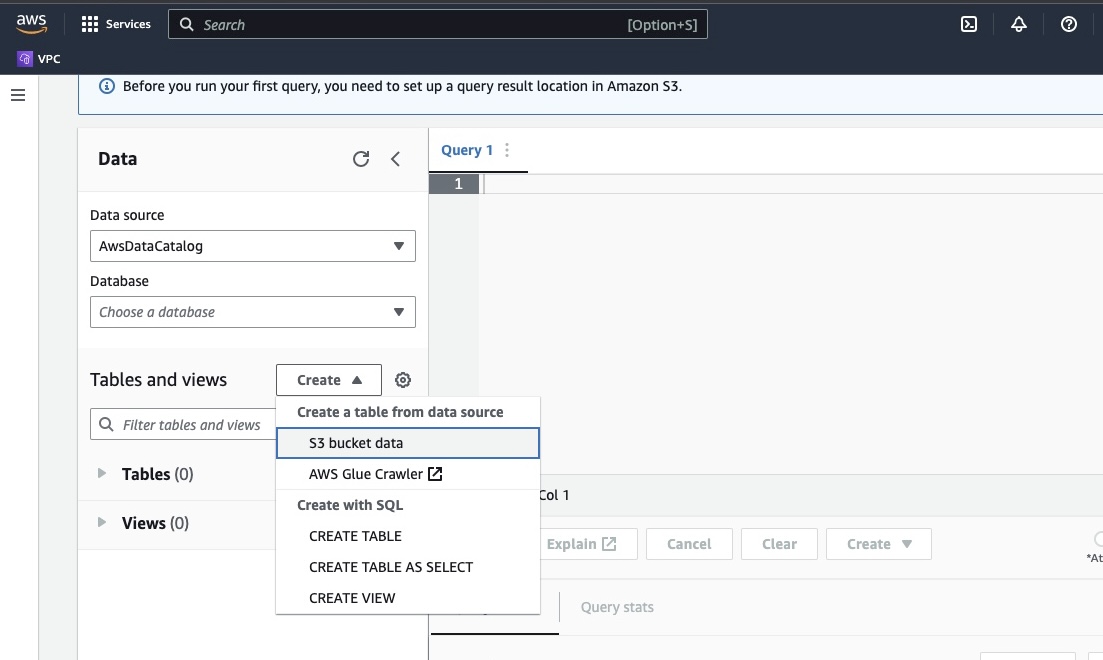
Type in the path of your data file in the part highlighted as LOCATION.
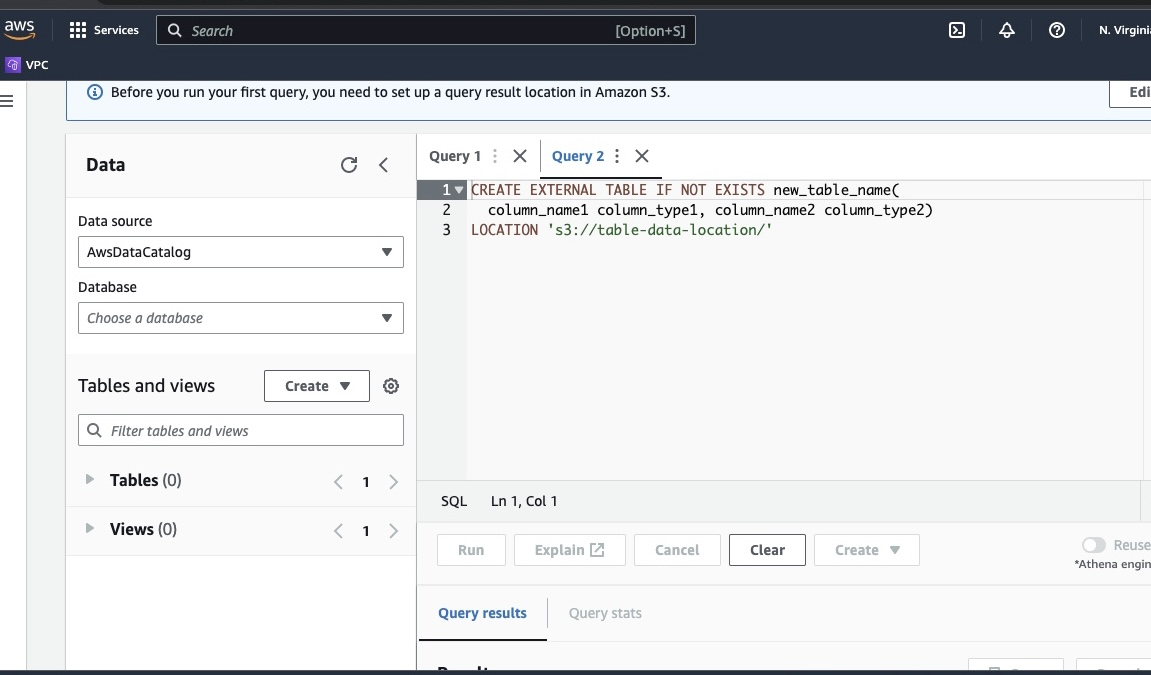
Go along with the prompts to define the schema for the data and save the table. Now, you can run a query to validate that the data is loaded correctly and then clean and preprocess the data
An example:
This query identifies the duplicates present in the data
SELECT row1, row2, COUNT(*)
FROM table
GROUP row, row2
HAVING COUNT(*) > 1;
This example creates a new table without the duplicates
CREATE TABLE new_table AS
SELECT DISTINCT *
FROM table;
Finally, export the cleaned data back to S3 by navigating to the S3 bucket and the folder to upload the file.
Understanding the Spark Framework
The Spark framework is an open-source, simple, and expressive cluster computing system which was built for rapid development. It is based on the Java programming language and serves as an alternative to other Java frameworks. The core feature of Spark is its in-memory data computing abilities which speed up the processing of large datasets.
Configuring Spark to work with S3
To configure Spark to work with S3 begin by adding the Hadoop AWS dependency to your Spark application. Do this by adding the following line to your build file (e.g. build.sbt for Scala or pom.xml for Java):
libraryDependencies += "org.apache.hadoop" % "hadoop-aws" % "3.3.1"
Input the AWS access key ID and secret access key in your Spark application by setting the following configuration properties:
spark.hadoop.fs.s3a.access.key <ACCESS_KEY_ID>
spark.hadoop.fs.s3a.secret.key <SECRET_ACCESS_KEY>
Set the following properties using the SparkConf object in your code:
val conf = new SparkConf()
  .set("spark.hadoop.fs.s3a.access.key", "<ACCESS_KEY_ID>")
  .set("spark.hadoop.fs.s3a.secret.key", "<SECRET_ACCESS_KEY>")
Set the S3 endpoint URL in your Spark application by setting the following configuration property:
spark.hadoop.fs.s3a.endpoint s3.<REGION>.amazonaws.com
Replace <REGION> with the AWS region where your S3 bucket is located (e.g. us-east-1).
A DNS-compatible bucket name is required to grant the S3 client in Hadoop access for the S3 requests. If your bucket name contains dots or underscores, you may need to enable path style access for the sake of the S3 client in Hadoop which uses a virtual host style. Set the following configuration property to enable path access:
spark.hadoop.fs.s3a.path.style.access true
Lastly, create a Spark session with the S3 configuration by setting the spark.hadoop prefix in the Spark configuration:
val spark = SparkSession.builder()
  .appName("MyApp")
  .config("spark.hadoop.fs.s3a.access.key", "<ACCESS_KEY_ID>")
  .config("spark.hadoop.fs.s3a.secret.key", "<SECRET_ACCESS_KEY>")
  .config("spark.hadoop.fs.s3a.endpoint", "s3.<REGION>.amazonaws.com")
  .getOrCreate()
Replace the fields of <ACCESS_KEY_ID>, <SECRET_ACCESS_KEY>, and <REGION> with your AWS credentials and S3 region.
To read the data from S3 in Spark, the spark.read method will be used and then specify the S3 path to your data as the input source.
An example code demonstrating how to read a CSV file from S3 into a DataFrame in Spark:
val spark = SparkSession.builder()
  .appName("ReadDataFromS3")
  .getOrCreate()
val df = spark.read
  .option("header", "true") // Specify whether the first line is the header or not
  .option("inferSchema", "true") // Infer the schema automatically
  .csv("s3a://<BUCKET_NAME>/<FILE_PATH>")
In this example, replace <BUCKET_NAME> with the name of your S3 bucket and <FILE_PATH> with the path to your CSV file within the bucket.
Transforming Data with Spark
Transforming data with Spark typically refers to operations on data to clean, filter, aggregate, and join data. Spark makes available a rich set of APIs for data transformation, they include DataFrame, Dataset, and RDD APIs. Some of the common data transformation operations in Spark include filtering, selecting columns, aggregating data, joining data, and sorting data.
Here’s one example of data transformation operations:
Sorting data: This operation involves sorting data based on one or more columns. The orderBy or sort method on a DataFrame or Dataset is used to sort data based on one or more columns. For example
val sortedData = df.orderBy(col("age").desc)
Finally, you may need to write the result back to S3 to store the results.
Spark provides various APIs to write data to S3, such as DataFrameWriter, DatasetWriter, and RDD.saveAsTextFile.
The following is a code example demonstrating how to write a DataFrame to S3 in Parquet format:
val outputS3Path = "s3a://<BUCKET_NAME>/<OUTPUT_DIRECTORY>"

df.write
  .mode(SaveMode.Overwrite)
  .option("compression", "snappy")
  .parquet(outputS3Path)
Replace the input field of the <BUCKET_NAME> with the name of your S3 bucket, and <OUTPUT_DIRECTORY> with the path to the output directory in the bucket.
The mode method specifies the write mode, which can be Overwrite, Append, Ignore, or ErrorIfExists. The option method can be used to specify various options for the output format, such as compression codec.
You can also write data to S3 in other formats, such as CSV, JSON, and Avro, by changing the output format and specifying the appropriate options.
Understanding Data Partitioning in Spark
In simple terms, data partitioning in spark refers to the splitting of the dataset into smaller, more manageable portions across the cluster. The purpose of this is to optimize performance, reduce scalability and ultimately improve database manageability. In Spark, data is processed in parallel on several clusters. This is made possible by Resilient Distributed Datasets (RDD) which are a collection of huge, complex data. By default, RDD is partitioned across various nodes due to their size.
To perform optimally, there are ways to configure Spark to make sure jobs are executed promptly and the resources are managed effectively. Some of these include caching, memory management, data serialization, and the use of mapPartitions() over map().
Spark UI is a web-based graphical user interface that provides comprehensive information about a Spark application’s performance and resource usage. It includes several pages such as Overview, Executors, Stages, and Tasks, that provide information about various aspects of a Spark job. Spark UI is an essential tool for monitoring and debugging Spark applications, as it helps identify performance bottlenecks, and resource constraints, and troubleshoot errors. By examining metrics such as the number of completed tasks, duration of the job, CPU and memory usage, and shuffle data written and read, users can optimize their Spark jobs and ensure they run efficiently.
Conclusion
In summary, processing your data on AWS S3 using Apache Spark is an effective and scalable way to analyze huge datasets. By utilizing the cloud-based storage and computing resources of AWS S3 and Apache Spark, users can process their data fast and effectively without having to worry about architecture management.
In this tutorial, we went through setting up an S3 bucket and Apache Spark cluster on AWS EMR, configuring Spark to work with AWS S3, and writing and running Spark applications to process data. We also covered data partitioning in Spark, Spark UI, and optimizing performance in Spark.
Reference:
For more depth into configuring spark for optimal performance, look here.
https://docs.aws.amazon.com/emr/latest/ManagementGuide/emr-connect-master-node-ssh.html